
This article will be a little different and a bit more technical than my usual ones. In the last few keynotes and CLEs I have delivered, I mentioned that you can connect several different LLMs (large language models) and have them work together on a single problem, whether that’s fact-checking a document, doing innovative research, or even playing different roles to tease out the best thinking.
Part I: Changing how we work
The old way was the copy-paste method we all grew up with. Ask Claude a question, paste the answer into ChatGPT, and ask ChatGPT to analyze it. Take those results and paste them back into Claude. Rinse and repeat. It worked, but it was extremely limiting and time-consuming. Most importantly, you were the middleman. Everything hinged on you copying and pasting the results back and forth.
There’s a much better way, but it’s more technical. There are multiple ways to do what I’m going to describe, but I’ll share exactly how I set mine up. First, you need to understand that to make this work, you have to be comfortable with the terminal (on Mac) or PowerShell (on Windows).
Step one is to download Claude Code on your computer. I’ll use Mac in all my examples, but the process is nearly identical on Windows. On your Mac, open Finder, click Applications, then Utilities, then Terminal. Or press Command+Space, type terminal, and hit return.
Now that you are in Terminal, do the following (install only the ones you will have / use).
To install Claude Code (Anthropic):
curl -fsSL https://claude.ai/install.sh | bash
To install Codex (ChatGPT):
curl -fsSL https://chatgpt.com/codex/install.sh | sh
To install AntiGravity (Google):
curl -fsSL https://antigravity.google/cli/install.sh | bash
To install Grok (SpaceX):
curl -fsSL https://x.ai/cli/install.sh | bash
Now that you’ve installed the ones you wanted, do the following. Start Claude by typing claude. Claude Code requires a Pro, Max, Ultra, Team, or Enterprise account (it doesn’t work with free plans). Log in to your subscription. Next, log in to Codex by typing codex. Sign in with one of your paid accounts (or an API key). Next up is Antigravity. Log in to that by typing agy (for some reason, I have a mental block on this one and keep typing agv). Enter your subscription information. Last is Grok. Log in to that by typing grok. Something to watch for: SpaceX does not have or sell a product called Grok CLI. Their coding agent is officially Grok Build, and the binary it installs is Grok.
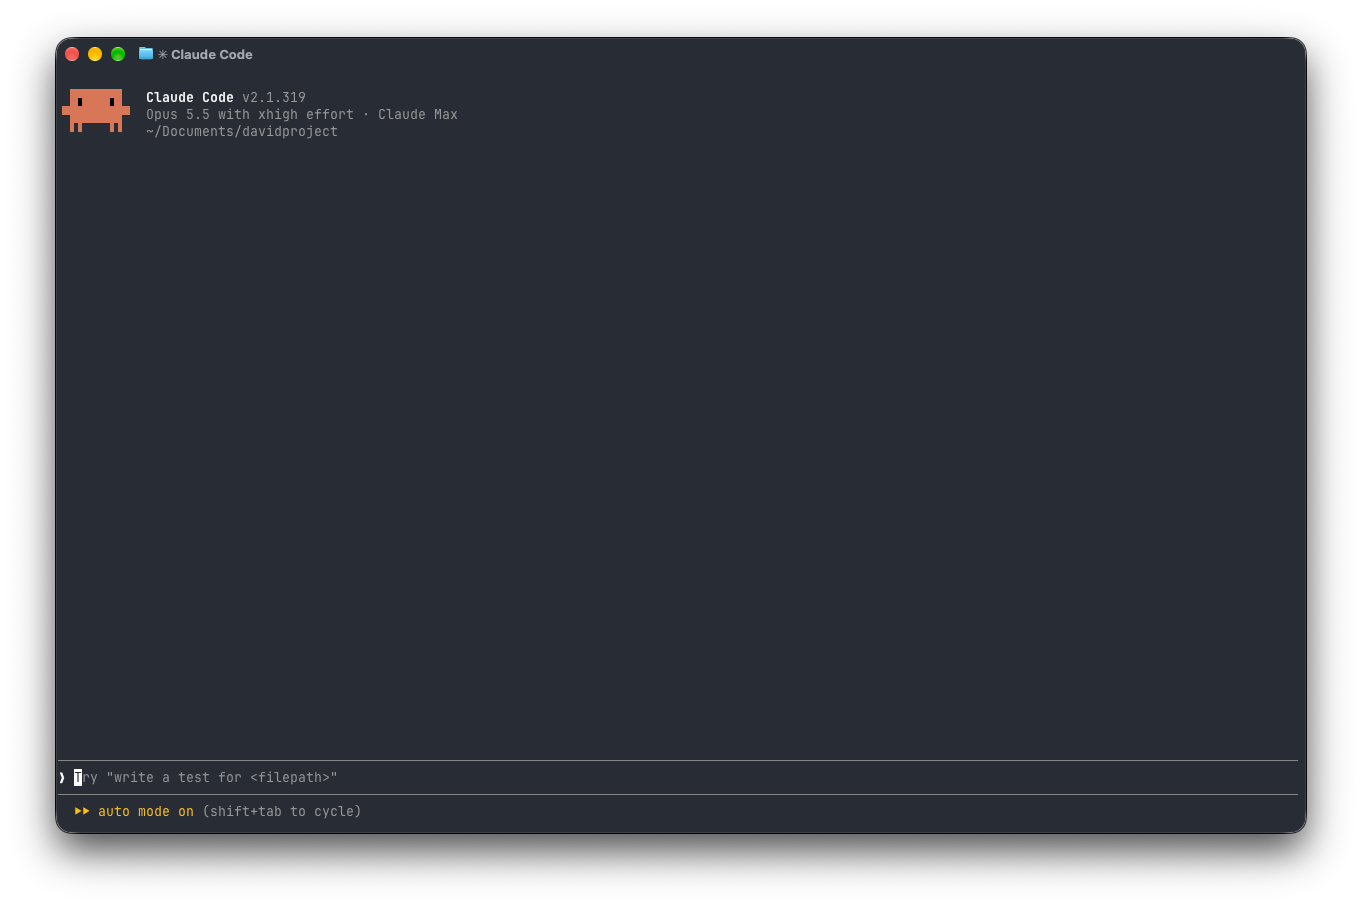
My personal preference is that I use Claude as my coordinator (it’s my most commonly used LLM). So I’ll fire up Claude, and I will often use Claude Fable 5.1 on xHigh as my coordinator. Using a tool like Claude Code in the terminal for the first time can be scary if you haven’t done it before. When you first go in it might look something like this:
Part 2: Models working together
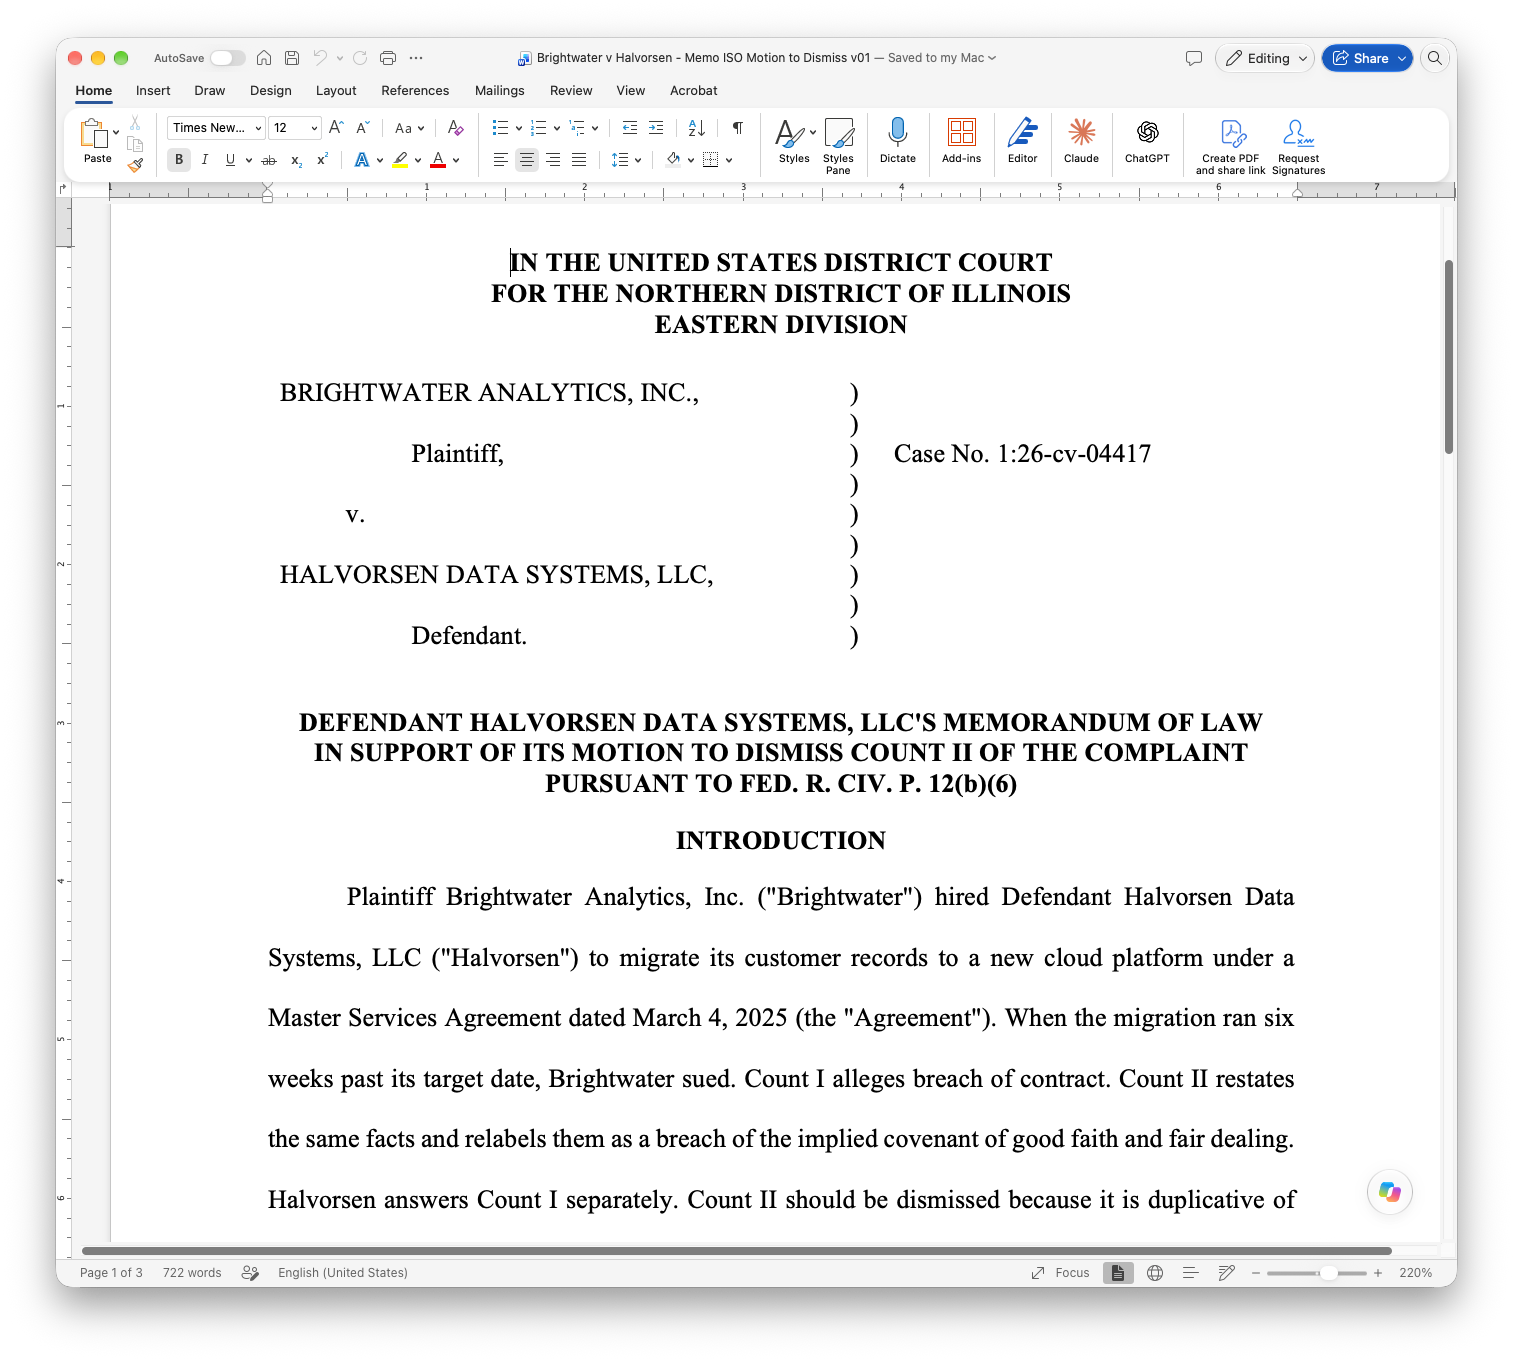
I’ll show you a simple example of what you can do here to have the models work together. I gave Claude the following prompt: “Create a Word doc for a fake legal case and put a couple of citations in there. Two of which are real and one of which is fake.” It quickly created this nicely formatted 3-page Word doc with two real citations and one fake one.
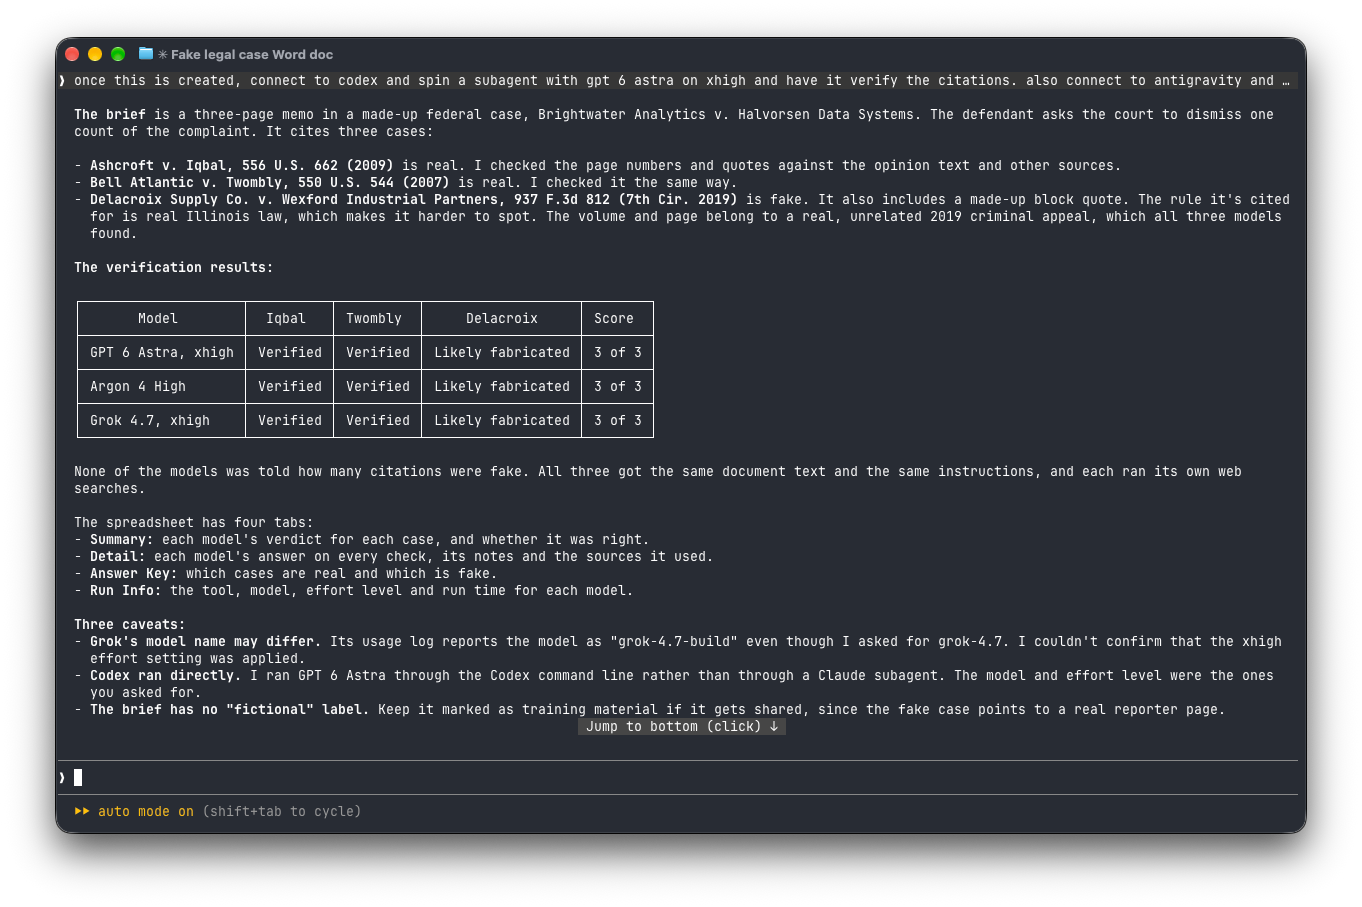
Now here’s where the fun happens. I told Claude, “Once this is created, connect to codex and spin a subagent with gpt 6 astra on xhigh and have it verify the citations. also connect to antigravity and use argon-4-high and have it verify citations and also connect to grok on 4.7 xhigh to also verify. bring all results back to a new excel spreadsheet”
It ran, and I could see the work happening. Claude connected to GPT-6, Argon 4, and Grok 4.7 through my CLI (command-line interface) installations on my laptop. At the end the window looked like this:
It created a comprehensive spreadsheet with the details I was interested in:
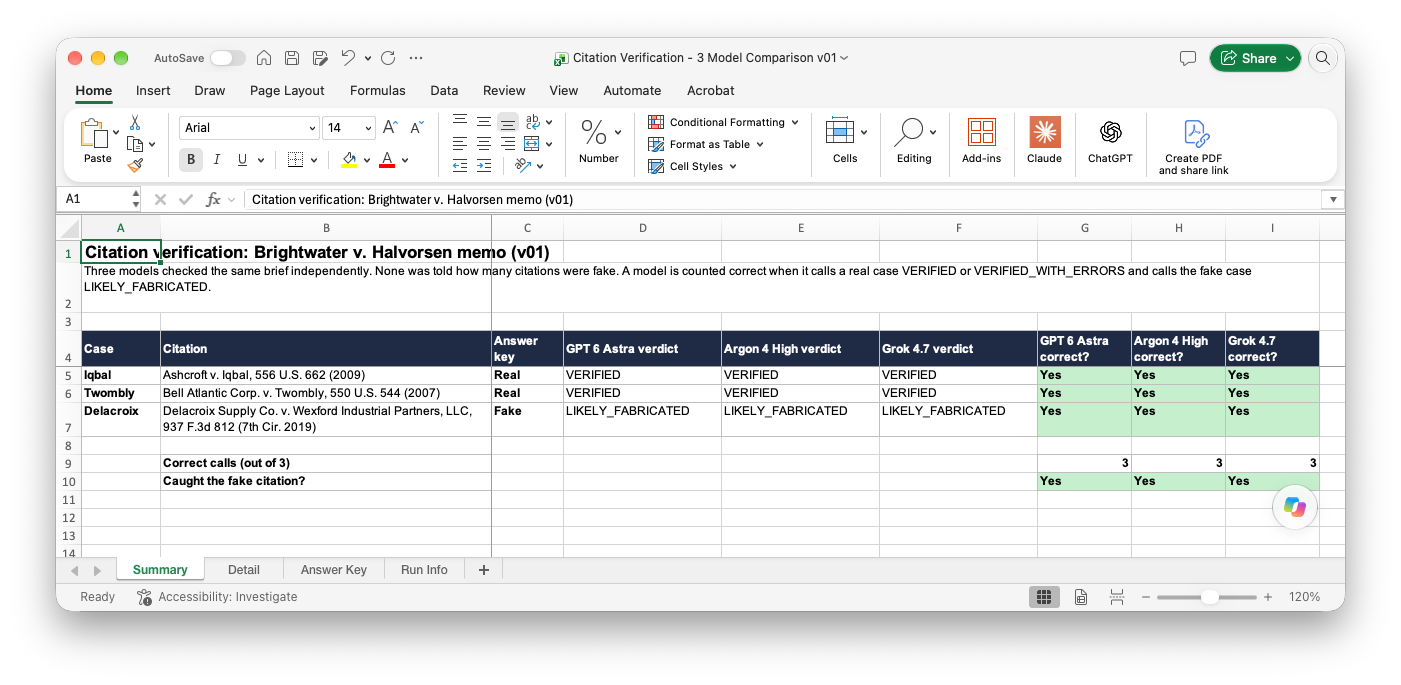
That’s just one use case. I use it for this type of fact-checking frequently. My philosophy is that it’s much better to have three brilliant brains helping do the checking (versus one). I find that if they disagree on something, that’s where I want to dig in.
Here are a couple of other really good use cases for things like this:
Pass a detailed spreadsheet to each of them, ask them to verify every formula, calculation, and assumption, and look for hardcoded cells that should be formulas.
Research a complex topic. Give each the same assignment and have them debate amongst themselves about the most important findings until they agree, then present me with a consolidated list.
Have them critically analyze a piece of writing or an analysis, but analyze it from different roles (e.g., Claude, you analyze it from the point of view of a law firm partner; ChatGPT, you analyze it from the perspective of a judge; Gemini, you analyze it from the point of view of opposing counsel). Have each identify the strengths, weaknesses, and flaws in what I shared.
Part 3: Tips to get even more value
Tip #1
First, many people I know have both personal subscriptions (hello, Claude Ultra!) and business subscriptions (Claude Team). It’s getting easier to switch between desktop and mobile apps for many of these models. Still, if you want to use a CLI version of these tools in the terminal, you have to log out and re-authenticate. Once you know how, it’s easy to set up multiple profiles on your laptop that can instantly launch a Claude Code session under either subscription.
If I type ‘claude’ into a terminal, it spins up my regular Claude Ultra account. If I type ‘claude-work’ into the terminal, it automatically pulls up my Team account. I can run both at the same time. Here’s how to set this up on a Mac (Windows is similar - ask your favorite LLM how to do it).
Step 1: Add the claude-work shortcut into your shell settings and then reload them. Type the following into a terminal session:
echo ‘alias claude-work=”CLAUDE_CONFIG_DIR=$HOME/.claude-work claude”’ >> ~/.zshrc
source ~/.zshrc
Step 2: Create the work folder and add your personal skills so you can keep one copy of each skill. Type the following into a terminal session:
mkdir -p ~/.claude-work
ln -s ~/.claude/skills ~/.claude-work/skills
Step 3: Keep your work sessions for ten years instead of the default 30 days. Type the following into a terminal session:
[ -f ~/.claude-work/settings.json ] || echo ‘{ “cleanupPeriodDays”: 3650 }’ > ~/.claude-work/settings.json
Note that this command only works if the settings file doesn’t exist. If it does exist, you will need to add it by hand (ask Claude how).
Tip #2
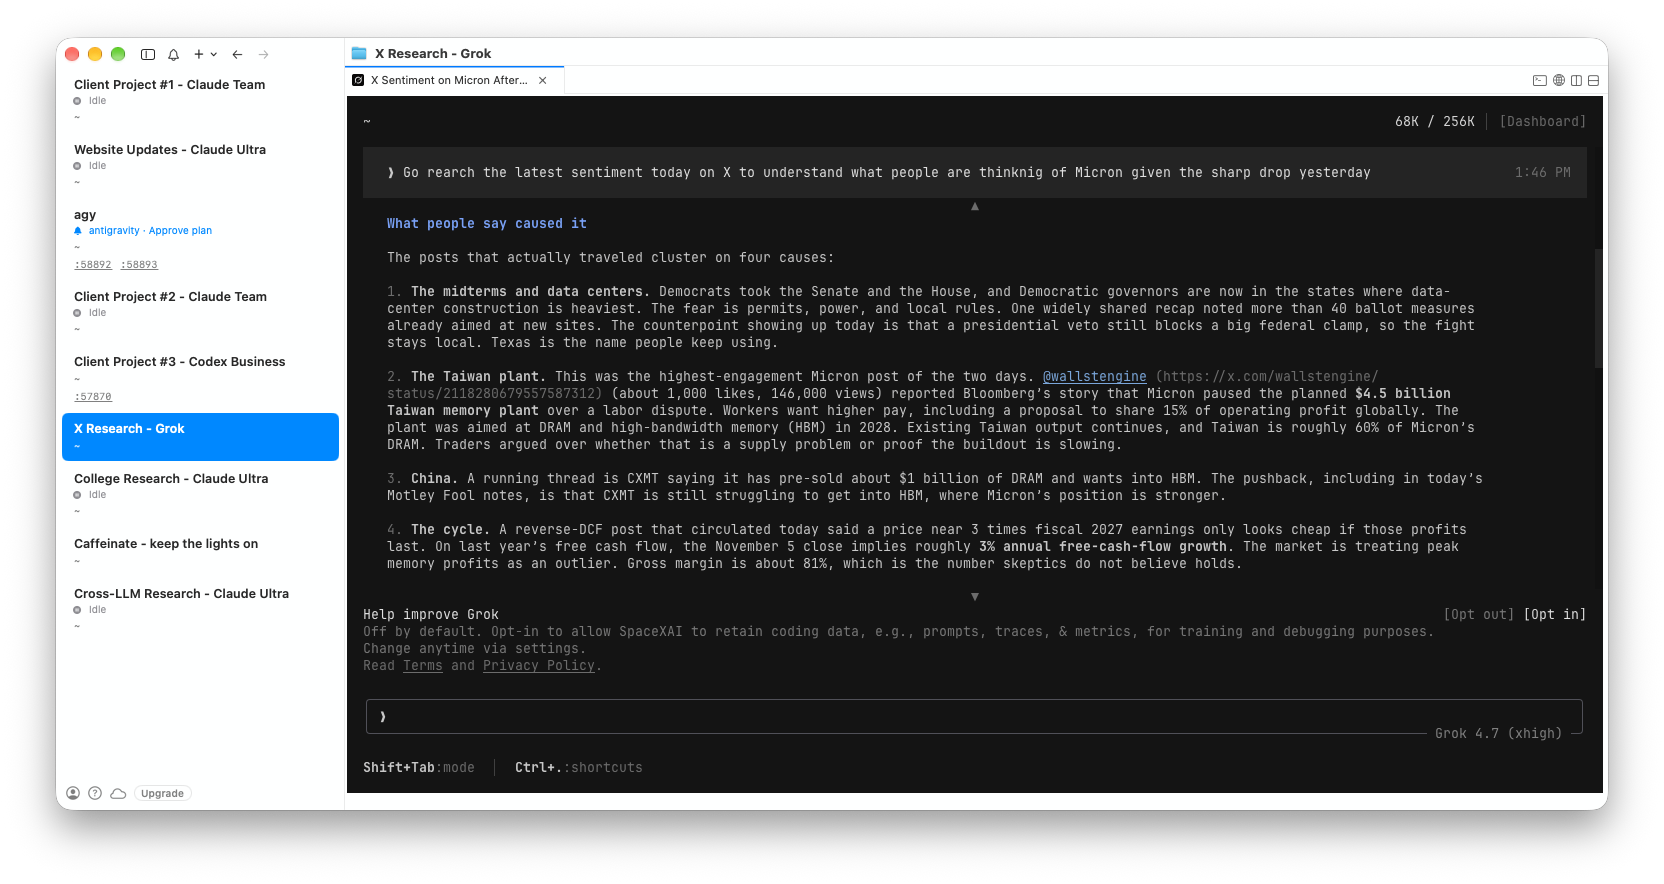
I typically have anywhere from five to fifteen (5-15) projects going on at any one time, between personal projects, client projects, and building this business. The client ones run in my Team account, and my personal ones run in my Ultra account. I also often run smaller tests in AntiGravity and Grok. Having these scattered across four platforms would be a pain. Fortunately, there are better solutions. I happen to use a Mac-only product called cmux. It lets me run all my projects, no matter the platform, in one environment.
I can’t show you my actual running cmux (too many client names and projects), so I made this version so you can see what it looks like. All the different projects are down the left-hand side (I like vertical tabs). I have two Claude Team processes running for different clients, three different sessions running Claude Ultra, an AntiGravity session, and a Grok session. You can have as many as you want, and I find it incredibly easy to jump back and forth and instantly see the status of anything. There’s a similar open-source tool for Windows called wmux (note that I have not personally tried this one).
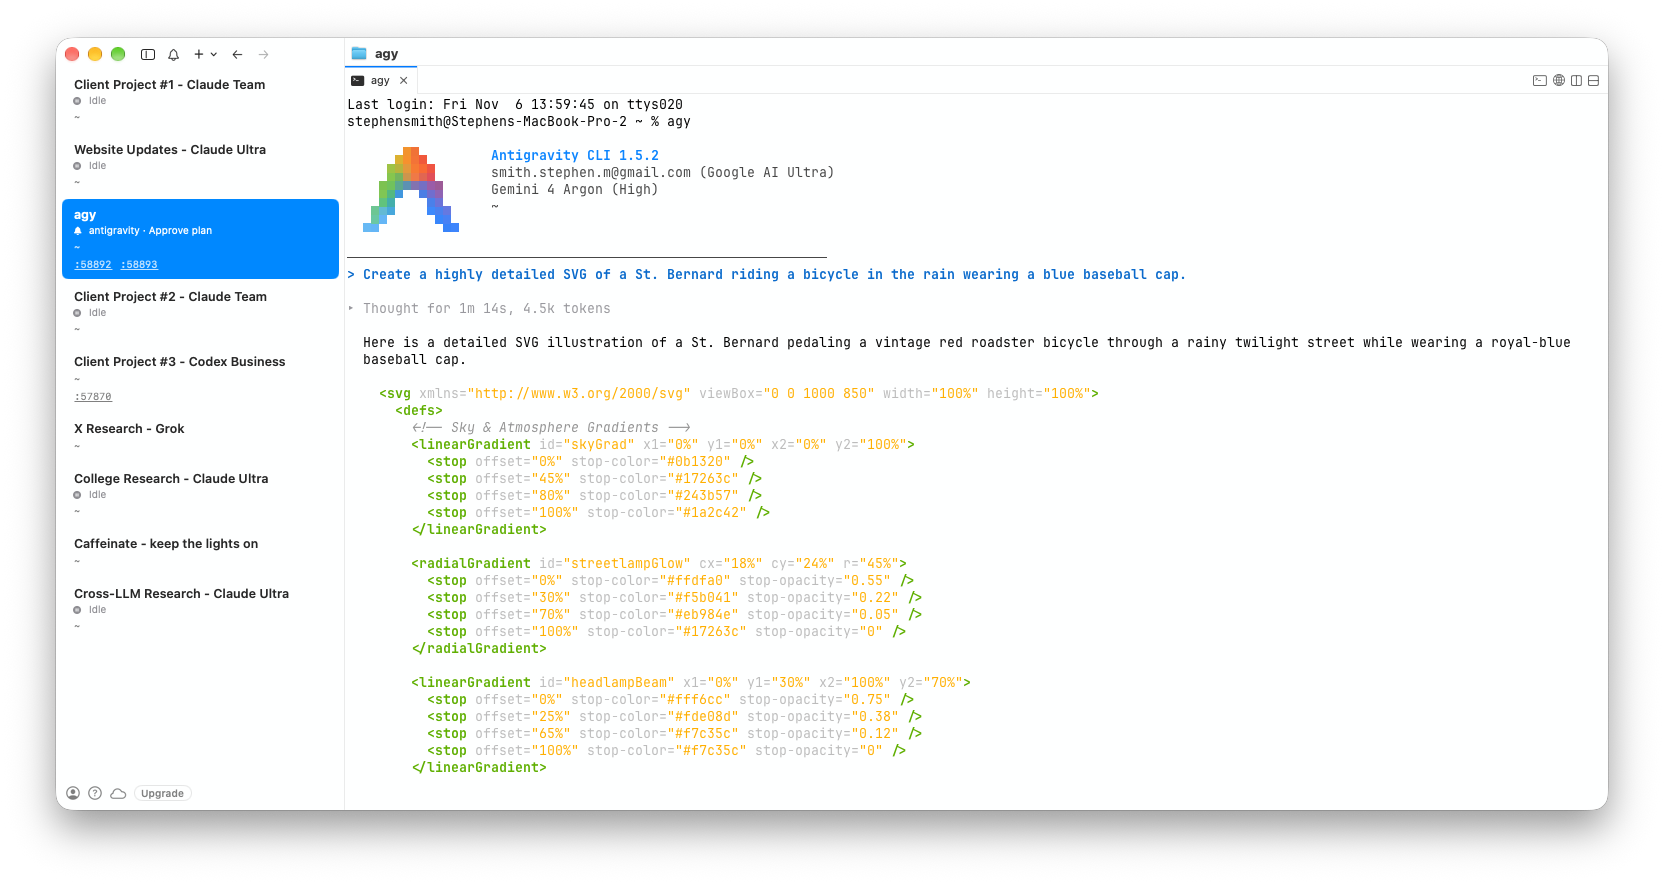
Here’s the SVG that Argon created. This is the absolute BEST I have ever seen Google create. It kind of makes me wonder if this wasn’t Carbon, because the last time I tried this with Argon, it wasn’t that good. It wasn’t even close.

An important note: I don’t get paid by any of the products I write about. I have no financial relationship with any of the frontier labs or other tools I use (other than paying for them myself!). I always think it’s important to be transparent about that.
What to do on Monday
As I said when I started this article, it was not one of my normal ones. But so many people have asked me how to do it that I finally wanted to put pen to paper. Here’s what I would do on Monday.
Download these command-line interfaces and try them. Don’t be scared of the terminal / PowerShell prompts. It’s easy once you get the hang of it.
Try them one at a time for a simple task. It’s just like using Claude, ChatGPT, or Gemini (but text only). Go back to basics with a prompt like “Write a three-paragraph story about why Steve’s St. Bernard, Magnus, is the best one.”
Find a task and have your preferred model call the others. For example: “Claude. I want you to spin up an Opus 5.5 xHigh subagent and a Codex GPT 6 Astra xHigh subagent and have each independently go analyze the future of the DRAM marketplace and give me your best estimates as to when supply and demand will be closer to parity. Once you have both done your research, compare and contrast and argue back and forth until you come up with a consensus answer for me.”
I hope you enjoyed reading this article. If you did, please share it with others! If you get stuck trying this, please drop me a line!
Here’s a shot of the real Magnus patiently waiting for me to finish eating so he can have his own plate of filet mignon. Spoiled dog.